How To Do Roof Installation On Homes In Maryland
Gearing Up For A Roofing Project?
Ever wondered what it takes to properly install a roof? Curious about the various steps and materials involved in a successful roofing project?
Look no further! This blog post will guide you through the entire roof installation process, from start to finish. By the end, you’ll be well-equipped to tackle your own roofing installation in Bowie, MD, like a pro.
Time: 5+ days
Difficulty: Intermediate
Cost: $10,000+
Tools
- Hammer
- Nail gun
- Pry bar
- Chalk line
- Tape measure
- Ladder
- Utility knife (with hook blades)
- Straight edge
- Roofing shovel
- Safety gear (gloves, safety glasses, and non-slip boots)
Materials
- Roofing materials (new shingles, metal, clay, concrete tiles, slate, or wood shakes)
- Underlayment (felt paper, ice and water shield)
- Drip edge
- Metal flashing
- Roofing nails or staples
- Ventilation products (ridge vents, soffit vents)
- Ridge cap shingles or special ridge tiles
- Gutters
How To Stay Safe When Installing Roof Shingles
Safety should always be your top priority when working on a roof. Wear safety gear such as gloves, safety glasses, and non-slip boots. Use a sturdy ladder to access the roof and have a partner to help you with the heavy lifting.
Be aware of your surroundings, especially the edge of the roof, and avoid working on wet or slippery surfaces.
DIY roofing isn’t the best idea for many reasons, and we do not recommend anyone attempting it.
How To Install A Roof On A House

*The installation process will change based on the type of roof, material, and other options you choose. We recommend installing the best type of roof for the Maryland area.
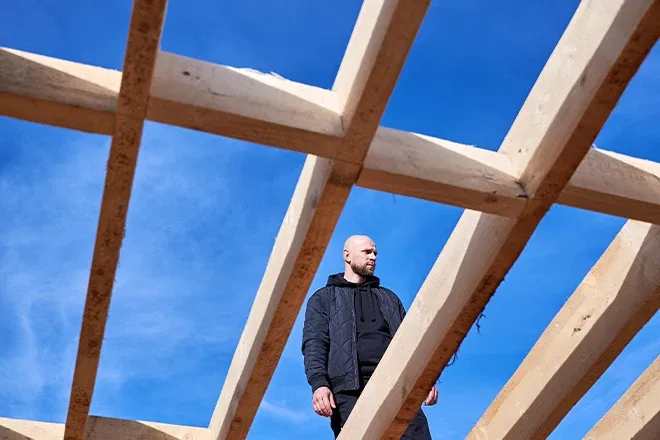
1. Planning And Preparation
Assessing Your Current Roof Condition
Before beginning a new roofing project, assess the condition of your current roof.
Look for signs of damage, leaks, and wear. Take note of all the exposed nails, damaged shingles, and areas where water may be pooling.
You can also inspect your attic for signs of water intrusion or mold. Be sure to document your findings with a few photos to help with the planning process.
Researching Local Building Codes And Permits
Each area has its own set of building codes and permit requirements for roof installations.
Check with your local building department to ensure you are following the proper guidelines for your project. This may include restrictions on the type of roofing materials allowed, the number of layers of shingles permitted, and the roof’s fire rating.
Selecting A Qualified Roofing Contractor
If you choose to hire a professional, research and select a qualified roofing contractor. Look for a contractor with a solid reputation, great reviews, proper licensing, and insurance. This is where you won’t want to let roofing installation costs affect your judgment.
Estimating Costs And Budgeting
Estimate the cost of your roofing project by taking into account the materials, labor, and any necessary permits. Create a budget and be prepared for unexpected expenses that may arise during the project.
Preparing For Roof Replacement
Before starting your roof replacement, clear the area around your home of any debris or obstacles. This will help protect your property and make it easier for workers to access the roof.
Protecting Your Property
Use tarps and plywood to protect your landscaping, windows, and other vulnerable areas of your property during the roofing process. Be prepared to clean up any debris that may fall during the project.
2. Removing Old Roofing Materials
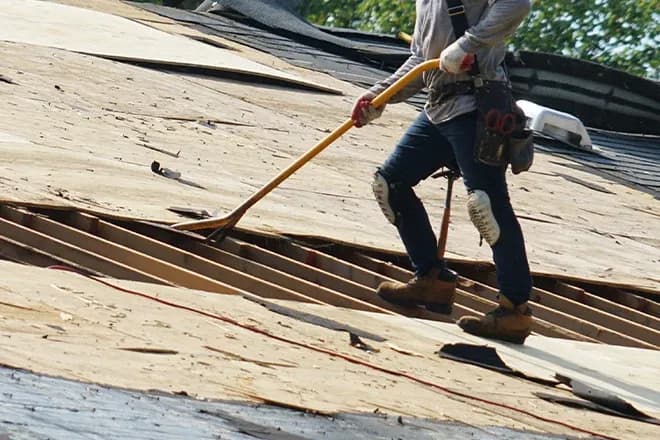
Begin by removing all the old shingles and underlayments from your old roof. Use a roofing shovel or pry bar to carefully lift and remove the materials, taking care not to damage the roof deck underneath.
Dispose of old materials responsibly.
3. Inspecting And Repairing The Roof Deck
Once all the old shingles and underlayment have been removed, inspect your roof deck for damage or rot. Replace any damaged or rotting boards, and make sure the deck is clean and free of any debris.
Ensure that all nails and staples have been removed or hammered down flat. This is also a good time to repair or replace any damaged fascia boards.
4. Installing Proper Ventilation And Insulation
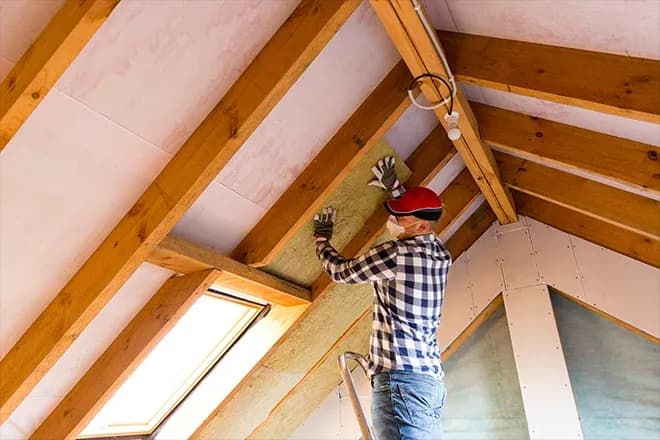
Proper ventilation and insulation are essential for maintaining the health and longevity of your new roof.
Ensure that your attic has adequate insulation and that there are sufficient soffit vents and ridge vents installed. Proper ventilation helps prevent issues like ice dams and mold growth, while insulation helps regulate the temperature inside your home.
5. Installing The New Roof
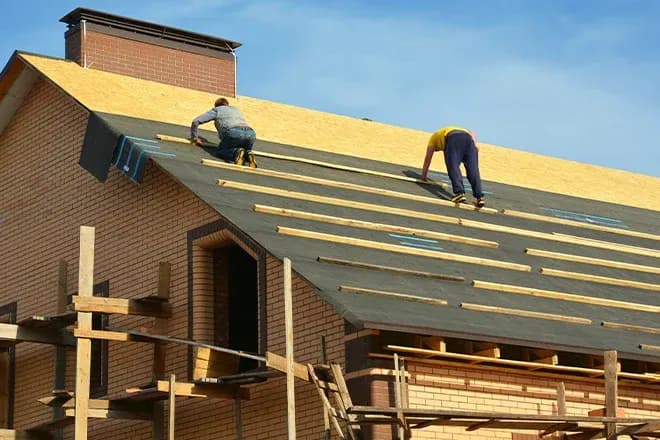
Laying The Underlayment
Before installing the new roofing materials, lay down an underlayment. This can be felt paper or an ice and water shield, depending on your climate and local building codes.
The underlayment provides an additional layer of protection against moisture and helps create a smooth surface for the roofing materials.
Installing Drip Edges And Flashing
Drip edges and flashing are essential components of a properly installed roof.
Install the drip edge along the roof edge to prevent water from seeping underneath the roofing materials. Install flashing around roof features like chimneys, vents, and valleys to provide extra protection against water intrusion.
Laying Roofing Paper
Roofing paper, or tar paper, is another layer of protection for your roof. It’s typically installed over the underlayment and helps create a barrier against wind-driven rain and other elements.
Start at the bottom edge of the roof and work your way up, using an overlapping pattern to ensure proper coverage.
Installing Roofing Materials
Depending on the type of roofing material you’ve chosen, the installation process will vary. Below are some general guidelines for the most common types of roofing materials.
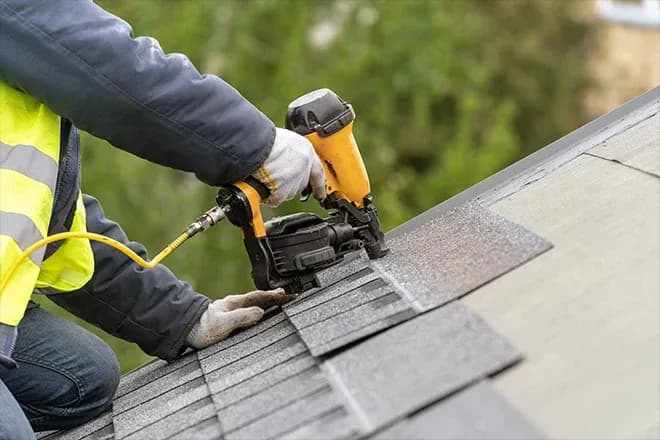
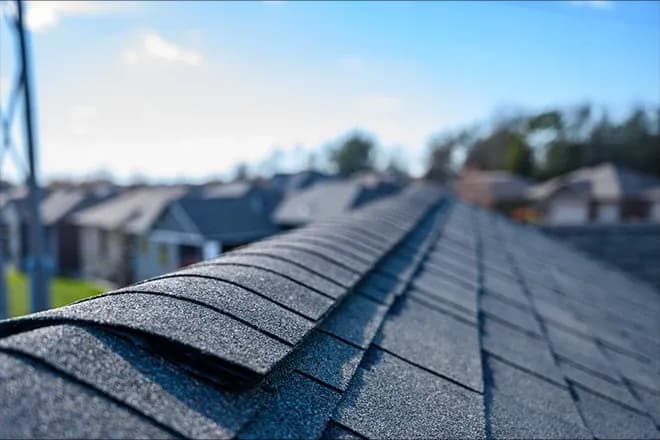
Asphalt Shingles Installation
A. Start at the bottom edge of the roof
Begin the shingle installation at the bottom edge of the roof. This will help create a solid foundation for the rest of the shingles.
B. Install starter strip shingles
Apply starter shingles along the bottom edge of the roof. These special shingles help create a tight seal and prevent shingles from being lifted by strong winds.
C. Apply shingles in a staggered pattern
Install the asphalt shingles in a staggered pattern, working your way up the roof. This pattern helps create a strong, watertight barrier and gives your roof an attractive appearance.
D. Trim shingles around roof features (vents, chimneys, etc.)
When you reach roof features like vents and chimneys, trim the shingles to fit around them. This may require cutting the shingles with a utility knife or using a straight edge for precise cuts.
Metal Roofing Installation
For metal roofing, begin by installing the proper underlayment and then follow the manufacturer’s instructions for installing the metal panels. Be sure to use appropriate fasteners and sealants for a watertight seal.
Clay And Concrete Tiles Installation
Tile roofs require a specialized installation process, involving the use of battens and clips to secure the tiles. Follow the manufacturer’s instructions and local building codes for proper installation.
Slate Installation
Slate roofs are installed using a similar process to tile roofs but require additional care due to the fragile nature of the slate. Ensure that the roof structure can support the weight of the slate, and use proper fasteners to secure the slate tiles.
Wood Shake Installation
Wood shakes are installed using a staggered pattern similar to asphalt shingles. They require proper ventilation and should be installed over a felt paper underlayment for optimal performance.
6. Replace Or Cut New Vents
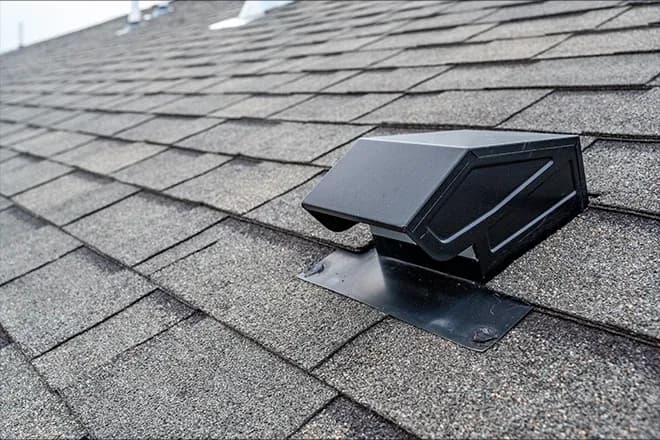
If necessary, replace or cut new vents for your roof during the installation process. Proper ventilation is essential for the health and longevity of your roof.
7. Installing Ridge Vents And Ridge Caps
Once all the roofing materials have been installed, it’s time to add ridge vents and ridge caps. Ridge vents help provide proper ventilation for your attic, while ridge caps create a watertight seal along the peak of your roof.
Install the ridge vents according to the manufacturer’s instructions, and then apply ridge cap shingles or special ridge tiles over the vents to complete the installation.
8. Add Gutters
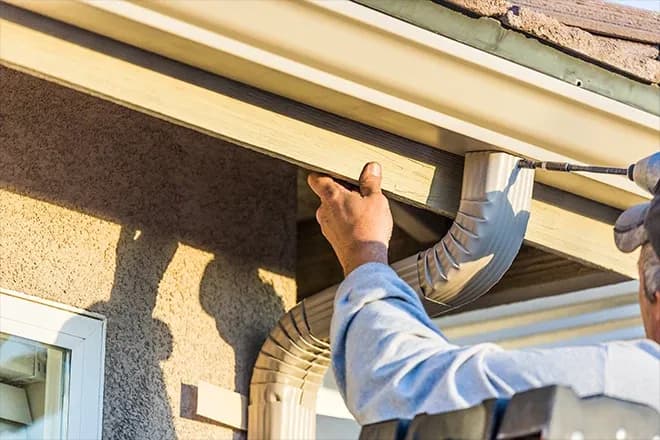
After the roof installation is complete, don’t forget to add gutters. Gutters help direct water away from your home’s foundation and prevent damage to your landscaping.
Install gutters along the edges of your roof, ensuring they’re properly sloped and connected to downspouts for efficient water drainage.
Inspecting And Maintaining Your New Roof
Regular Roof Inspections
To keep your new roof in optimal condition, schedule regular roof inspections. This will help you identify any potential issues early on, preventing costly repairs or damage to your home.
Cleaning And Maintenance Tips
- Keep your roof clean and free of debris, such as leaves and branches.
- Trim any overhanging tree limbs to prevent damage to your shingles.
- Clean your gutters regularly to ensure proper water drainage and prevent ice dams in colder climates.
Addressing Minor Repairs
If you notice any minor issues with your roof, such as missing or damaged shingles, address them promptly. Taking care of small problems early can prevent them from becoming larger, more expensive issues down the line.
Choosing The Right Roofing Materials
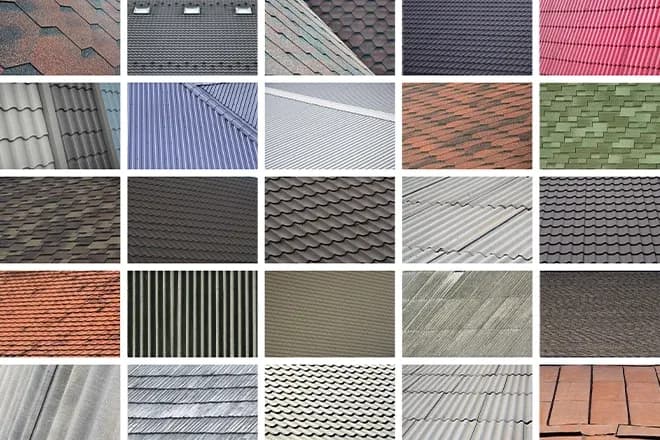
There are a variety of roofing materials available on the market, each with its own set of benefits and drawbacks. Some of the most popular options include:
Asphalt Shingles
Asphalt shingles are a popular choice due to their affordability, ease of installation, and variety of styles and colors. They have a relatively short lifespan compared to other materials, typically lasting 20-30 years.
Metal Roofing
Metal roofing is known for its durability, energy efficiency, and low maintenance requirements. It can last up to 50 years or more, depending on the type of metal and the quality of installation.
Clay And Concrete Tiles
Clay and concrete tiles are known for their beauty and durability. They can last up to 50 years or more but may require additional structural support due to their weight.
Slate
Slate is a high-end roofing material known for its beauty, durability, and long lifespan. It can last up to 100 years or more but requires specialized installation and maintenance.
Wood Shake
Wood shakes provide a natural, rustic appearance and can last up to 30 years with proper maintenance. However, they can be susceptible to rot and insects and may require additional fireproofing treatments.
Synthetic Roofing Materials
Synthetic materials, such as rubber or plastic, can mimic the appearance of other roofing materials while offering improved durability and lower maintenance requirements. Their lifespan varies depending on the specific material and installation quality.
Factors To Consider When Choosing Materials
When selecting roofing materials for your home, consider factors such as:
- Cost
- Durability
- Maintenance requirements
- Aesthetic appeal
Additionally, take into account local building codes and any specific requirements for your climate, such as fire resistance or protection against ice dams.
Install A Roof You Can Trust With Integrity Home Pro
In conclusion, a successful roof installation requires careful planning, the right materials, and proper installation techniques. By following the guidelines outlined in this blog post, you can ensure a durable, attractive, and long-lasting roof for your home.
At Integrity Home Pro, we’re committed to providing top-quality roofing services to help you protect your investment and enjoy the benefits of a well-installed roof. Our team of experienced professionals is ready to help you choose the best materials and provide expert installation for your new roof.
If you’re considering a roofing project, don’t hesitate to fill out our contact form today or give us a call. Let us help you create a durable and beautiful roof that will last for years to come.
Other Recent Posts
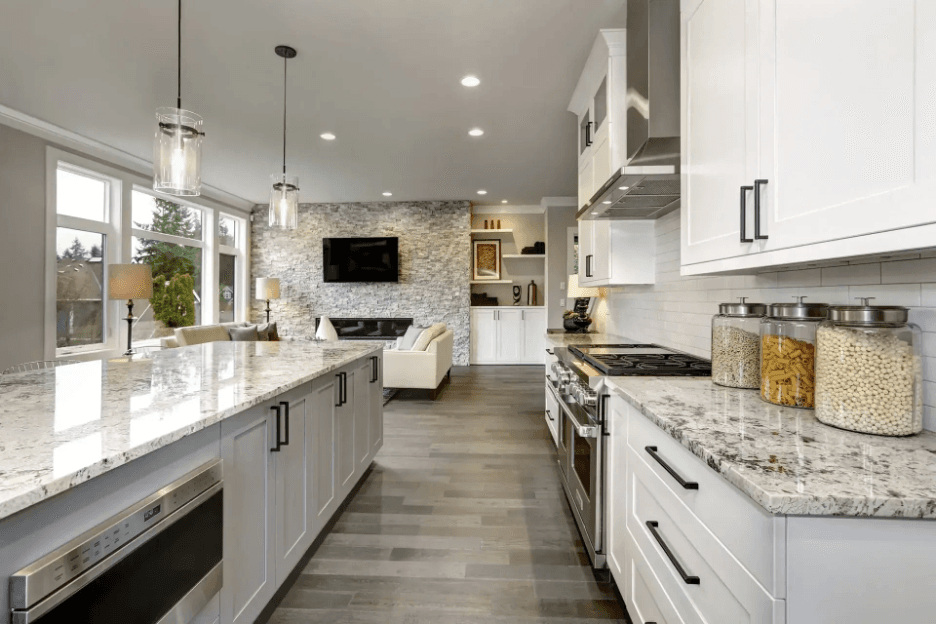
A full kitchen remodel with Integrity Home Pro covers every step of the transformation, including personalized design, custom cabinetry, countertops, flooring, lighting, plumbing upgrades, and layout changes. With professional project management, quality craftsmanship, and a 10-year labor warranty, homeowners receive a seamless, start-to-finish remodeling experience designed to improve both function and style.
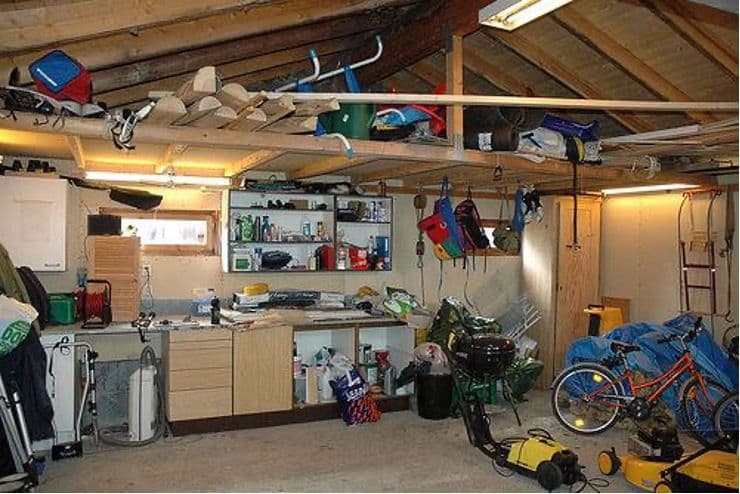
A cluttered garage can make it difficult to park your car, find tools, or fully use the space in your home. This guide explains how to efficiently declutter and organize your garage by emptying the space, creating functional zones, sorting items into keep, donate, and trash piles, and maximizing vertical storage. It also shares tips for making your garage more attractive and easier to maintain long-term.
Thinking about adding a sunroom to your home? Learn what impacts the average cost of sunroom addition projects—from design choices to climate considerations—and how to plan a space that fits your budget and lifestyle.

Featured Customer Review
Integrity Home Pro did an amazing job with replacing our garage door, roof, soffits, and gutters! Ben and his team were extremely professional throughout all of those jobs and were respectful of our property, especially our gardens!
Contact Integrity Home Pro
We’ll Help You Love Your Home Again
We Stand By Our Work And Our Customers
We Follow The Golden Rule
We follow the golden rule—do unto others as you would have them do unto you. Our belief ensures you will have a wonderful remodeling experience, we'll treat you fairly, communicate with you daily, and you'll never feel any sales pressure.
Industry Leading Warranties And Satisfaction Guarantee
We back up our services with a 10-year labor warranty for all interior work and a 20-year labor warranty for all exterior work. We also offer a 6-month 100% money-back guarantee.
Integrity Certified Crew
We value you and our relationship and will always look out for you. We ensure our crews are Integrity Certified, which means they are professionally trained, drug-tested, and background-checked.
Contact Integrity Home Pro
We’ll Help You Love Your Home Again
Our Customer-Focused Process
Embracing Open Communication Guided By The Golden Rule

Our Awards and Affiliates


Reimagine Your Home And Experience Elevated Living In The Greater DC Area