
Thinking About Doors? Use this Entry Door Checklist
July 27, 2026
Installing a front, entryway door is not an impossible task with the right approach. Below, you’ll find a comprehensive entry door checklist with everything you need to prepare yourself for the task.
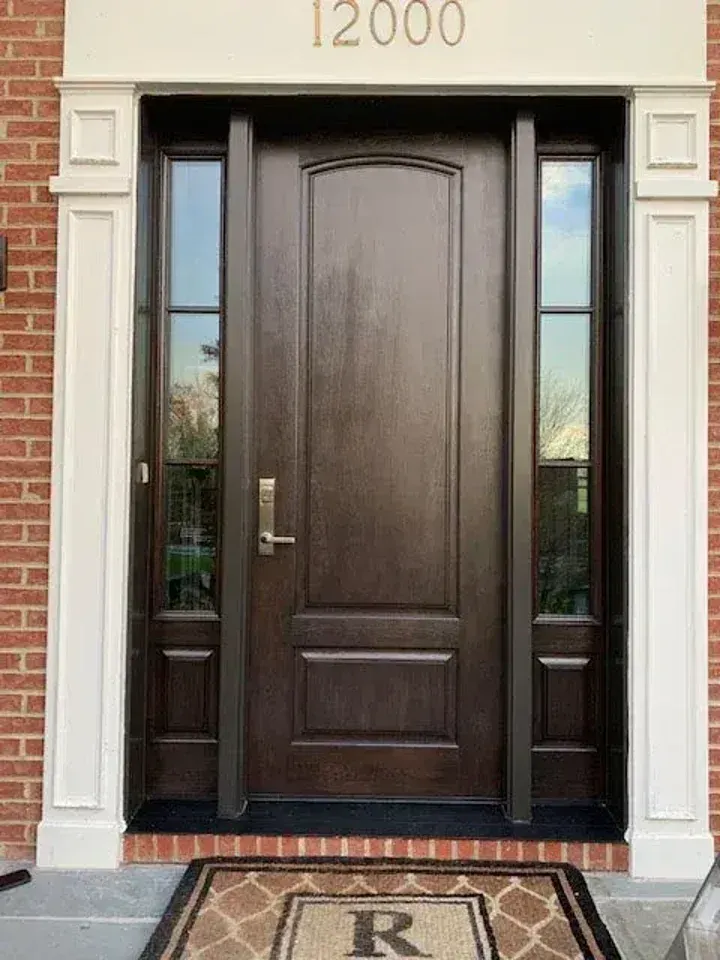
First, though, let’s discuss the difference between “pre-hung” doors and other ones. A pre-hung door is an exterior door that is already mounted to a frame. The hinges and lockset are already installed and bored into it. These are by far the easiest doors to hang, though they are much pricier than everyday doors.
1: Gathering the Tools
First off, you need to make sure you have all of the tools you’ll need. Here is a list of tools and materials that are common for hanging entry doors, though different models and sizes can call for more:
Tape Measure
Level
Screwdrivers/Drills
Finishing Nails
Pry Bar
Foam or Fiberglass Insulation
Hammer
Wood Shims
Caulk and Caulking Gun
Reciprocating Saw
The screws may or may not come with a prefabricated door, though having a few extra on hand is a good way to avoid having to run back out to the hardware store.
2: Removing the Door
First off you should have the new door on hand before doing any “door extraction.” Remove the old door and the interior trim. Measure the depth of the door opening and the height and width. Newly installed doors should be about half an inch less in the vertical and almost a full inch skinnier. Make sure you have the handle on the correct side of the door (are you a righty or a lefty?) before moving onto the next step of the entry door checklist:
Remove the existing door’s trim carefully to re-install it in the new frame. Some already have pre-attached trim, which means this can be pitched.
Remove insulation around the old door.
With a hammer or screwdriver, remove any hinge pins to take the old door out of the frame.
After the door is off, unscrew the hinges.
Next, remove any nails, screws, or other components that are attached to the doorjamb or the sill. This may require a reciprocating saw.
Remove the old frame from the house — this may require some effort with a pry bar.
3: Installing the New Door
Once the old door is removed, have someone help you “dry-fit” the new door into the frame and measure it to make sure it fits properly. Make sure the subsill (the strip where the door rests on the bottom) is level and square. You can adjust the sill with shims.
While the frame is open, now is a good time to check the house frame for any mold or dry rot. Call in a professional for repairs if this is the case. Following is the rest of the entry door checklist:
Measure to see if the new door gets stuck in the bottom sill.
Apply caulk to the subsill for weatherproofing to “bed” the threshold.
From the exterior, raise the new frame into its place.
Insert shims until the doorframe is square and plumb in the entryway.
Put shims in the hinges to lock the door in place.
Screw in the hinges and shims to keep them in place.
Re-measure to make sure the spacing is equal on all sides.
Once the hinges are screwed in, make sure the door swings open and closes again without getting stuck on the subsill.
Secure the frame with additional shims.
Snap off excess shims and score them down.
Spray insulation into the frame’s gaps.
Once dried, trim off foam access.
Attach any trim that came unattached.
Paint if necessary and enjoy.
There you have it, an entry door checklist you can use on your next DIY project.
Following this entry door checklist, homeowners can avoid calling in specialists to hang front doors.
Other Recent Posts
Discover how adding a custom composite deck can increase home value in Maryland. Learn about the benefits of composite decking, value-adding features, and the importance of professional deck installation.

Learn how to install a pre-hung entry door with this comprehensive DIY guide. From gathering the right tools and removing your old door to properly fitting, leveling, and securing a new exterior door, this step-by-step checklist covers everything homeowners need for a successful installation. Improve your home's security, energy efficiency, and curb appeal with expert tips for hanging a pre-hung front door the right way.
Curious about the siding installation process? This guide walks homeowners through every step of an Integrity Home Pro siding installation, including the consultation, product selection, home preparation, professional installation, cleanup, final walkthrough, and post-project support, so you know exactly what to expect from start to finish.

We Stand By Our Work And Our Customers
We Follow The Golden Rule
We follow the golden rule—do unto others as you would have them do unto you. Our belief ensures you will have a wonderful remodeling experience, we'll treat you fairly, communicate with you daily, and you'll never feel any sales pressure.
Industry Leading Warranties And Satisfaction Guarantee
We back up our services with a 10-year labor warranty for all interior work and a 20-year labor warranty for all exterior work. We also offer a 6-month 100% money-back guarantee.
Integrity Certified Crew
We value you and our relationship and will always look out for you. We ensure our crews are Integrity Certified, which means they are professionally trained, drug-tested, and background-checked.
Contact Integrity Home Pro
We’ll Help You Love Your Home Again
Our Customer-Focused Process
Embracing Open Communication Guided By The Golden Rule

Our Awards and Affiliates










Reimagine Your Home And Experience Elevated Living In The Greater DC Area